
Why Gallery Walls Go Wrong (And How to Avoid It)
Gallery walls fail for predictable reasons: frames hung too far apart, a layout that drifts off-center, or a collection of pieces with nothing visually connecting them. The good news is that each of these problems is entirely preventable with a bit of upfront planning.
The most important mindset shift is treating the wall as a single composition rather than a series of individual frames. When you step back and squint at a finished gallery wall, your eye should travel comfortably across the grouping—not get lost hunting for a logical center. If you're still deciding what art formats to use, our guide to wall art formats breaks down the visual weight of prints, canvas, and mirrors so you can mix them confidently.
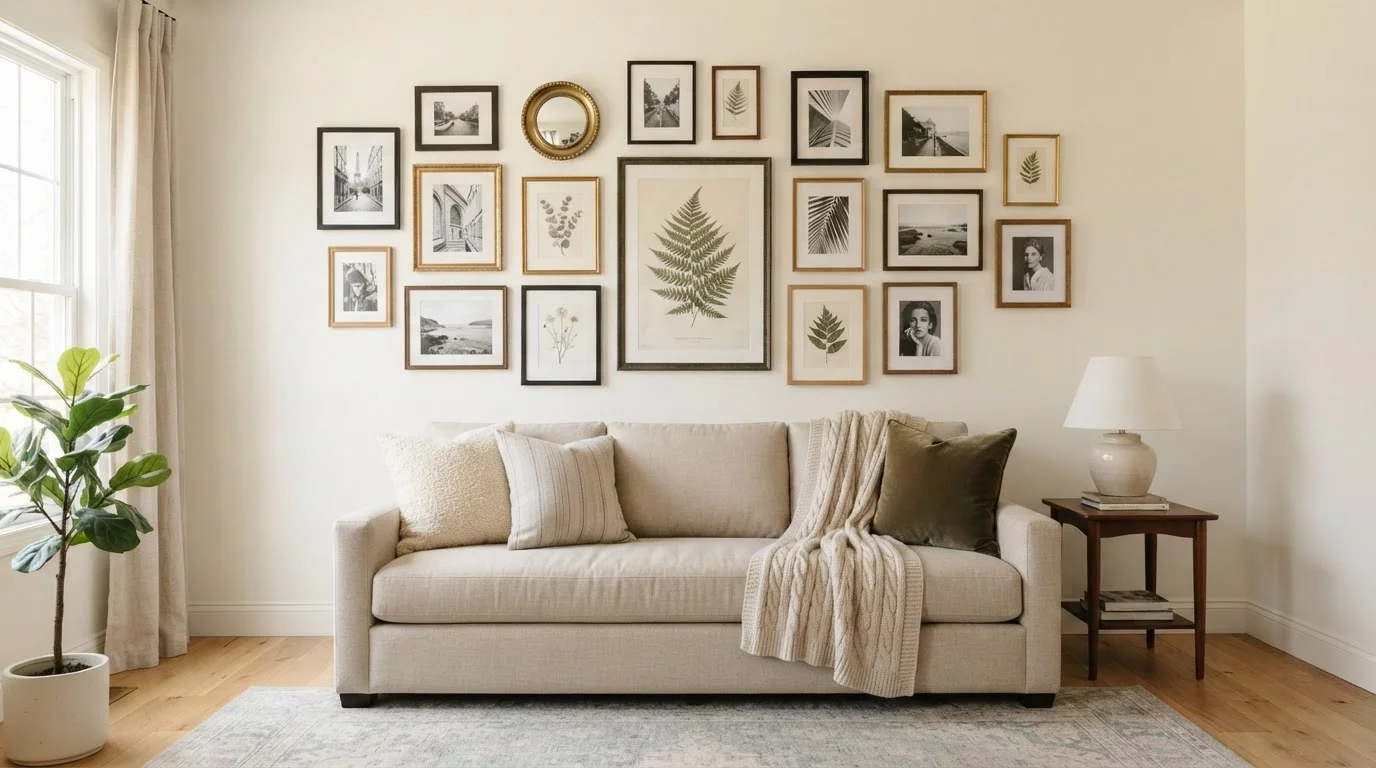
One common misconception is that every piece needs to match. In fact, the opposite is usually true. Matching everything often flattens a room—variety in frame finish, art style, or medium is what gives a gallery wall a collected, personal feel. The key is finding one or two unifying threads: a consistent mat color, a shared color family in the artwork, or a deliberate frame finish like all-black or all-natural wood.
Start With a Clear Visual Anchor
Every strong gallery wall has one piece that draws the eye first—usually the largest item or the one with the most visual weight. Place this anchor piece slightly off-center in your arrangement and build the rest of the composition around it. This prevents the layout from feeling like a random scatter of frames and gives the viewer's eye a natural starting point.
What You'll Need Before You Start
Gathering the right tools before you begin saves significant frustration mid-project.
What you will need
Tape measure
Measure frame dimensions and verify consistent spacing between pieces.
Painter's tape
Attach paper templates to the wall without damaging the paint surface.
Kraft paper or paper bags
Create frame-sized templates to plan nail placement before any holes are made.
Hammer and picture hooks or nails
Secure frames to the wall at the marked hanging points.
Level (bubble or laser)
Ensure frames and rows are hung straight and horizontally aligned.
Pencil
Mark hardware positions on paper templates and lightly on the wall.
Stud finder
Locate wall studs for safely hanging heavier frames.
Rubber adhesive bumpers
Stick to the lower back corners of frames to prevent tilting after hanging.
Step-by-Step: Planning and Hanging Your Gallery Wall
Follow these steps in order. The floor-planning and paper-template phases take the most time but eliminate the majority of mistakes people make once they're holding a hammer.
Gather and edit your collection
Lay out every piece you're considering on a large flat surface—the floor works well. Look critically at what you have. Aim for a range of sizes (at least three different frame dimensions) and a mix of orientations (portrait and landscape). Edit ruthlessly: if a piece doesn't connect to at least one other item through color, subject, or tone, set it aside.
Establish your unifying element
Before arranging anything, decide what ties your collection together. Options include a consistent mat color (white or off-white mats unify almost any mix), a shared frame finish, artwork that shares a dominant color, or a single subject theme like botanicals or travel photography. You only need one unifying element—two or more can feel forced.
Design your layout on the floor
Arrange all pieces on the floor in front of the wall you're targeting. Start with your largest or most visually dominant piece slightly left or right of center—not perfectly centered, which can look rigid. Build outward, alternating sizes and orientations. Keep gaps between frames consistent: 2 to 3 inches is the standard range for a tight, intentional look.
Photograph the floor layout from above before moving anything. This photo becomes your reference during hanging.
Create paper templates for each frame
Trace each frame onto kraft paper or cut paper bags to the exact frame size. Cut out each template and write the frame's name or a brief description on the front. On the back of each template, mark where the hanging hardware falls—measure from the top of the frame to the hook or wire at its hanging point and mark that spot on the paper.
Tape templates to the wall
Using painter's tape, affix your paper templates to the wall exactly as they appeared in your floor layout. Use a level to check horizontal alignment across the grouping. Step back frequently and adjust. The marked hardware point on each template shows you precisely where to drive the nail—no measuring twice with the actual frame in hand.
Drive nails and hang frames
With templates still in place, drive a nail or picture hook through the hardware mark on each template directly into the wall. Remove the paper template and hang the frame. Work from the top row down so you're not reaching over already-hung frames. Check each frame with a level before moving to the next.
Finishing Touches and Common Adjustments
Once everything is hung, take a full step back—ideally from the opposite side of the room—and assess the overall composition. A few things to check:
- Spacing consistency: Uneven gaps are the most common issue. A laser level or a simple ruler can reveal gaps that your eye missed up close.
- Visual balance: If one side feels heavier, consider swapping a larger piece toward the lighter side, or adding a smaller frame to balance the weight.
- Frame security: Give each frame a gentle horizontal nudge. Frames that shift easily benefit from a small adhesive rubber bumper on the lower back corners to keep them from rotating.
Gallery walls work especially well in living rooms, hallways, and stairwells—but they can also transform a bedroom. See our bedroom décor guide for ideas on incorporating a gallery wall into a restful, personal space. And if you're considering whether a gallery wall fits your overall wall strategy, our look at accent walls can help you decide when a single bold treatment serves the room better.
For readers who want to go deeper on the layering principles behind rooms that feel truly styled, this overview of décor layering applies directly to how a gallery wall fits within a full room composition.